All the cool graphic designers were once also new to their business. Therefore, there is no shame that you are looking for background information on how to draw simple shapes in CorelDRAW. In today's tutorial we will tell you how to draw in this advanced graphical editor. We will learn how to draw lines, rectangles, polygons, circles, arrows and other objects.

We draw the simplest figures
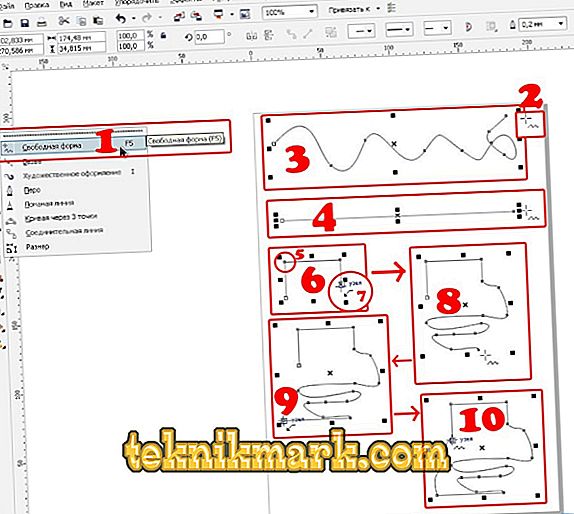
Lines
The editor CorelDRAW is a broad functionality regarding the drawing lines. You can depict both absolutely straight and curved and curved contours, as well as combine several types of them. To draw a line:
- On the toolbar on the left side of the workspace, find the Freeform option.
- Place the cursor on the free space, hold down the left mouse button and drag it in the desired direction. You can note that a regular curved line will be drawn, repeating the path of the cursor.
- To draw a completely straight line, without any deviations to the side, near the Freeform tool, click on the small dot in the bottom corner to bring up the pop-up menu of advanced options, and then select the Straight through two points option.
- Place the cursor on an empty place of the workspace, then, holding the left mouse button, pull in the right direction. As you can see, the dash will be completely straightforward.
- If you want to draw a polyline, in the pop-up menu of the option “Freeform” you will need to select the corresponding item.
- On empty space, put a few points that follow the contours of your polyline, and the tool will immediately draw a line, connecting the points together. Notice that at each of the corners there are markers, moving which you can change the outlines of the object.
- To draw a curved strip, in the pop-up menu for the Freeform option, select Curve through three points.
- Draw a straight line in the direction you want, then move the cursor to another location. You will see how after him izognotsya circuit.
- No less interesting option is the "B-spline". The essence of his work is as follows: using this parameter, draw a broken line according to the principle described above. Then click the “Shape” option in the toolbar and click on a point at the beginning of the guide. You will see how sharp corners become rounded.

Rectangle
- To draw a square or a rectangle, you must use the Rectangle tool on the panel on the left side of the screen.
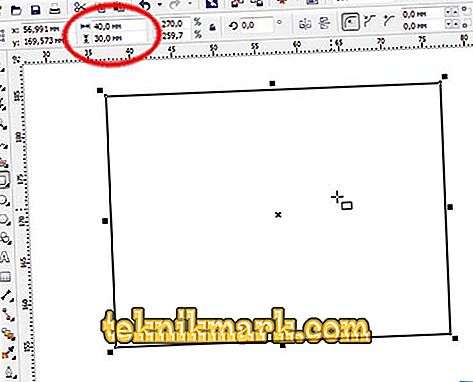
- Place the cursor on the free space and drag it diagonally while holding the left mouse button. After that, you can manually adjust the horizontal and vertical size by entering the corresponding data in the input fields in the upper part of the working area.
- To tilt a rectangle, use the Rectangle through three points function, which you can select from the Rectangle tool's pop-up menu.
- Draw a line along the diagonal that will later become one of the sides of the shape. After that, the left mouse button can be released, and the cursor stretch in the desired direction, depicting a square or rectangle. Tilt angles can be edited manually, as described above.

Polygon
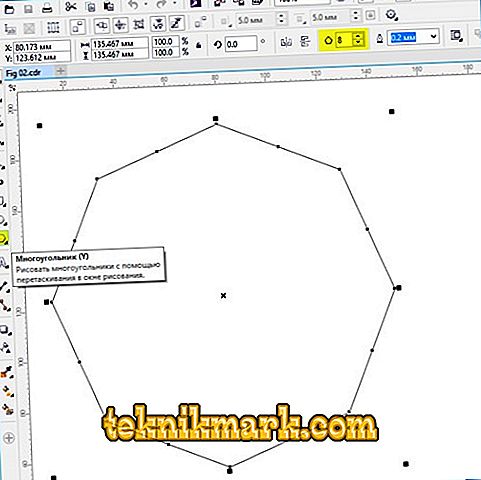
In CorelDRAW, you can also draw a polygon of almost any shape and with absolutely any number of angles. To do this:
- On the toolbar, select Polygon.
- Place the cursor on the free space of the worksheet and drag in the desired direction to adjust the size. At the same time, the left mouse button should be naturally clamped. Having defined the size, the button can be released.
- On the top attribute panel there is an interesting item with which you can change the number of corners. By and large, with this function you can draw almost any geometric shape, except for a circle. If you manually select the desired number of angles, you will see how the object has been transformed.
- To change the outlines, in the left toolbar, click "Shape", after which all points located at the edges of the polygon will stand out and become blue.
- Click on one of these markers and drag in the desired direction to change the shape of the object.

Star
Since the star is essentially a polygon, the drawing of this object and the setting of the parameters largely coincide with it.
- On the toolbar, move the cursor to the “Polygon” option and select the “Star” function from the drop-down menu.
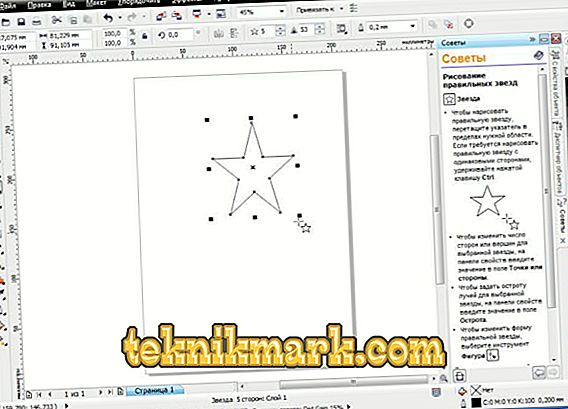
- Draw a star in the free space of the workspace, like any other shape.
- You can change the star with the same functions as the polygon. True, in this case several more unique options are available, for example, the sharpness of the angle. The higher the value, the sharper and thinner the tips will be.
- By selecting the "Complex Star" function from the "Polygon" drop-down menu, you can draw stars of bizarre shapes and outlines, including variants with intersecting lines.

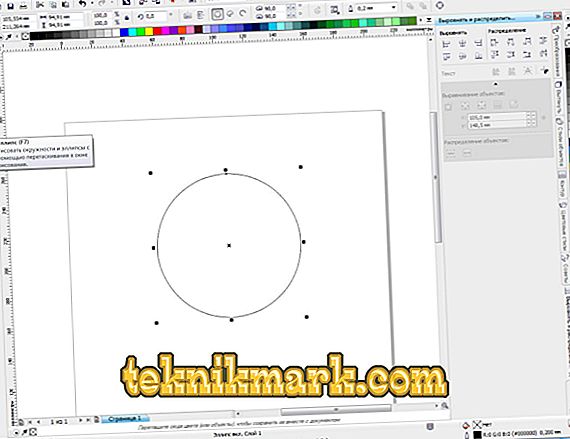
Circumference
With this option, you can draw almost any round or ellipse-like shape, including a circle, oval or semicircle. For this:
- On the toolbar, select "Ellipse."
- On the free space of the worksheet, click the cursor and, holding the left mouse button with your finger, drag in the desired direction. So you draw an oval or ellipse. In order to get a perfectly smooth circle, hold down the Ctrl key on the keyboard while dragging the shape.
- To place an ellipse on a slope, like the Rectangle tool, you can draw it with three points. To do this, select the appropriate function in the "Ellipse" menu.
- Draw a straight line that will correspond to the diameter of your circle, then drag the shape in the right direction. You can also manually specify the size and angle of inclination, just as you can do in the "Rectangle" menu.
- To draw a semicircle, select your circle, then on the top panel, click the Sector button, and in the input field next to it, specify an angle of 180 degrees.
- If you wish, you can change the side to which the circle of the semicircle will look.

Spiral
The helix is another simple figure that can be drawn very easily in CorelDRAW. How to do it right?
- To begin, move the mouse cursor to the “Polygon” option, then select “Spiral” in the pop-up menu.
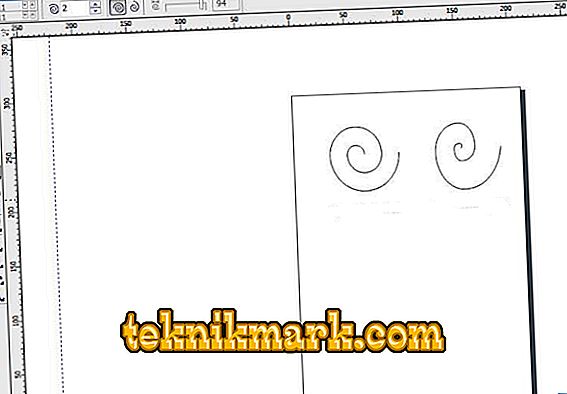
- Like any other tools, drag the mouse over the free space in the workspace, thus adjusting the size of the object. If at this moment you hold down the Shift key, the spiral will be drawn from the center to the edge, and if you hold down Ctrl, it will have the same size both vertically and horizontally.
- On the options bar at the top of the working field you can specify the number of turns. Please note that these changes will only be applied to the new shape.
- If you want to draw a logarithmic spiral, in which the width between the coils increases towards the edges, click the corresponding switch in the parameters panel, and also use the slider or manually set the unwinding factor.

CorelDRAW Standard Shapes
Virtually all other standard geometric shapes that are not included in the previous list can be drawn using the Basic shapes tool. How to draw an arrow or other correct object in Korela?
- On the toolbar, select the option "Basic shapes". The parallelepiped is selected by default, but you can select others in the options panel, including the arrow, the cross, the triangle, the cylinder, the heart, and many others.
- Select the desired object, for example, a triangle or a heart, and draw it from scratch.
- You will be able to choose the same parameters as for the other figures: size, angle, and outline. In addition, the “Line Style” parameter has been added, allowing you to select a line of different style and appearance for drawing an object.
Conclusion
Drawing geometric shapes using the CorelDRAW editor is not at all difficult, as it may seem at first glance. At first, you will get simple things, but over time, when you have more practice, you will be able to create more and more complex projects. In the comments ask questions that you have.