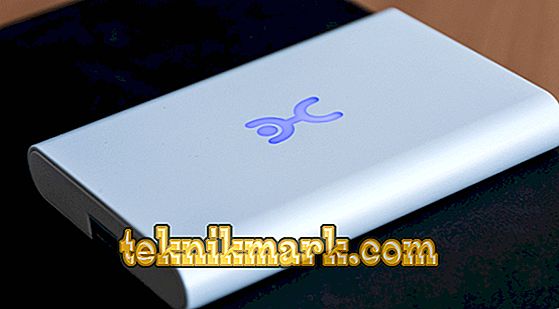
The Yota company offers to the market advanced mobile Internet technologies, favorable tariff plans, constantly improving and offering customers new technological solutions. Unlimited internet from a mobile device at high speed attracts more and more customers. For those who decide to try a technical novelty, it will be useful to learn how to connect and configure the Yota modem.

The most modern at the company at the moment are 4G / LTE standard devices. LTE is positioned as a state-of-the-art technology, an improved version of 4G, which allows to achieve several times higher speed. The company has a very decent site where you can get information about the coverage area, before you start buying, find out whether the device will work in general where we need it, and how difficult it is to set up a Yota modem. An interesting “test drive” service is proposed, the essence of which is that the client can return the purchased equipment within a week if it is not satisfied with it.
Equipment selection
The choice depends on the need and purpose of the acquisition. How often and where do you need the Internet, or is it used permanently, how many devices do you need to use and what kind of devices are they. Before you buy and connect the Yota modem to your laptop, understand the differences between the models. The company offers the following options:
- Portable Wi-Fi-modem (Yota Many), which distributes wireless Internet, just being in your pocket and requiring a power source. Charges from any USB, both micro and full sized, the battery lasts up to 16 hours. It works with micro-SIM, it is blocked from cards of other operators. By default, it creates an open network, but the first time you connect via the web interface, you can set encryption settings.

- 4G USB modem designed to work only with devices that have a USB port. Conveniently, in its design a turning mechanism is made. Easy to use, does not require special drivers and software installation.
- USB Wi-Fi-modem is a device that connects to the port and distributes wireless Internet. Works with 4G network. You can connect up to 8 devices: one via USB, the rest Wi-Fi, and if you buy a network adapter, then create a connection from 8 wireless clients. Provides several ways to connect a Yota modem to a computer.
- Comprehensive solutions for full-time access to the network, including several types of equipment. It allows you to create different networks with a wide coverage, multiple clients, connect IP-TV and work with IP-telephony. The question of how to configure the modem in this case is handled by professional IT specialists.
We now consider how to configure the Yota modem on a computer, laptop and other devices.
Pocket solution "Yota Many"
Setting up the Yota modem is extremely simple:
- Charge the battery. More capacious compared to previous versions, the battery (2280 mAh), which gives up to 60 hours of waiting, charges up to 70% within an hour. To charge the battery before installing it on a computer, the instrument must be connected to the computer with the supplied cable. It is possible directly to the USB-port, but at the same time it will automatically work as a USB-modem. Be sure to perform this item before you connect the Yota modem to a computer or other device.

- At the first connection, the device creates an open Wi-Fi network, which can be used immediately without setting up and installing additional software. To fine tune, go to the web-interface at status.Yota.ru. A window will appear prompting you to select encryption and network name. You can leave the network open. You can also combine the number of open and closed connections, change other settings at the specified address, or by entering in line 10.0.0.1. This can be done when connected to a laptop; in this case, the Internet comes to the laptop via a Wi-Fi module either on a tablet or smartphone.
- If you are an experienced specialist, you can change the advanced settings on the status.Yota.ru/advanced page. But the operator does not recommend doing this, at least, without coordination with the technical support service.
USB 4G device
The procedure for installing a Yota modem on a laptop is the same for a USB Wi-Fi and 4G USB model. To connect and configure a USB modem, follow these steps:
- Place the device in the USB port.
- A new connection will appear in the Network and Sharing Center.
- Launch the browser, and you will be automatically redirected to the Yota start page, where you will enter your registration information and enter your details. There is no need to configure anything else, you get installed high-speed Internet.
If the modem did not start automatically to connect, it means that there was a problem with autorun and the computer recognized the modem as a USB flash drive. Go to the folder of the new media and run the file autoinstall.exe, the device will start to be installed.
This is how you made sure that in a few minutes of simple setup you get high-speed Internet via the Iota modem at home, in the office, in the park or at the sea. Everywhere, where the mobile operator works.


