In Word, you can underline labels, spaces, tabs. Different types of lines are available: wavy, straight, double. There are also page separators, tables. Red, green and blue "waves" the program highlights errors and incorrectly designed text. To use this toolkit, figure out how to add these lines, how to change their attributes, and how to remove an underline in Word if it cannot be selected.

There are several ways to underline text in Word. We will tell about them below.
Simple underscore
You can make a strip under the label like this:
- Select a fragment.
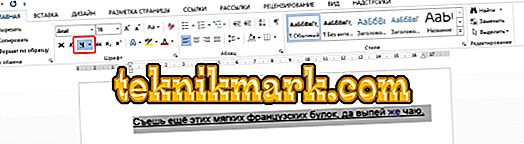
- On the main menu bar, find the letter “H” with a dash under it. Or press Ctrl + U. You can get rid of the line with the same key combination.
- To print with stripes already, click on the “» ”icon, write something, and click on Ч again.
The operation itself is quite simple. But so you can add only the usual feature. Here's how to emphasize text in Word, if you want to use different types and colors of strips:
- Select a fragment.
- Click the little arrow next to the letter “H”.
- In the drop-down list, select the color and type: double line, dashed, thick, wavy.

To create a strip that will stay in place while text is printed over it, you need to do the following:
- Through the "Tables" section (or Insert - Tables, if you have Word 2007) add a grid.
- Write a few words in it.
- Click on the frame with the right mouse button.
- "Borders and shading."
- The options will open. On the right there will be an area in which there are settings for the visibility of borders. Leave only the bottom line. It will remain in place even if you delete the text.
- In the same menu, select the type and thickness of the strip.
You can make it easier:
- After adding the grid, the “Working with Tables” section will appear at the top of the window. In it, go to the "Designer" tab.
- Click the arrow next to "Borders".
- Leave only the option "Lower Limit" active.
These strips are needed when working with HTML-documents. This technique is suitable for creating input fields and web forms.
If you want to add lines exclusively to the inscriptions, without touching the spaces, it is not necessary to customize the design of each preposition. Here's how to underline a word in Word:
- Highlight text.
- Click on the black arrow next to the letter “H”.
- Item "Other".
- In the Underline field, select Word Only.
Underscore spaces
Sometimes you need the lines to be under the spaces. For example, if you are preparing to print a document in which there should be a place to enter a name, a surname or other data. For this fit the table (interaction with them is described above). But there are other ways. Here's how to make an underline in Word without words:
- The easiest method is to press Shift + [-] (hyphen; without parentheses). A line will appear. This is not part of the design, but a symbol. All font settings apply to it.
- To change the color of the strip, find the button with the letter “A” in the menu bar. Click on the arrow next to it - a palette will open.
The underscore is not always suitable for the design. You can not print over it - it will move. It is difficult to align to the width of the paragraph. If your automatic replacement is activated, three lines in a row will automatically turn into a border.
In Word, you can add stripes to tabs. Their markup is easier to configure.
- Press the "TAB" key. It is located above the Caps Look button. Word cursor will move.
- It is better to activate the display of hidden characters in order to see tabs, and not just a set of words. To do this, click on the toolbar on the icon similar to the letter “P” (the button is called “Paragraph”). Or press Ctrl + Shift + * (asterisk). Tab in Word looks like an arrow pointing to the right.
- Select it.
- Press Ctrl + U.
Printing over such lines also will not work. But they are much wider than spaces - it will be easier to align the line with them.
Page borders
If you type three asterisks or three hyphens in a row in Word, they can become a horizontal line (sometimes you need to press Enter to do this). This autocorrect turns them into a page border. To create a certain kind of such a line, you need to do this:
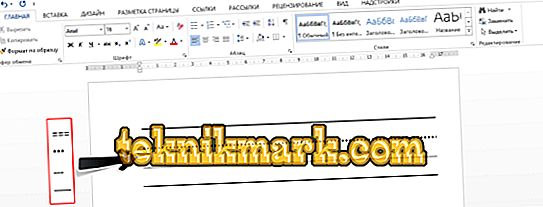
- Enter three equal signs (=) to create a double bar.
- Three asterisks (*) - dotted.
- Three hyphens (-) - simple.
- The bottom three spaces (_) are bold.
These boundaries are similar to the usual underscore. They occupy the entire line. They cannot be selected or edited. But you can print over them.
Here's how to remove a similar line:
- Place the Word cursor at the beginning of the bar line.
- Click Delete.
If this method does not help, it is better to do this:
- Section "Page Layout". It is in the menu bar at the top of the window.
- Button "Page Borders".
- In the "Type" field, set the parameter "No". The horizontal line will disappear.
Red, green and blue underscore - spell checker
Word has a spell checker. She marks wavy lines with spelling errors, punctuation, stylistics. With it, it is easier to notice a random typo, check the text, find any flaws. The following indicates what each bar means.
- Red The word is incorrectly written, or it is not in the Office database. Red color also denotes repetitions.
- Green Errors with grammar, stylistics, punctuation. Extra brackets. Inconsistent text.
- Blue Format mismatch.
Usually this feature is beneficial. But if you wrote everything correctly, the sudden wavy lines will annoy and interfere. How to remove underlining in Word, if it is set automatically when checking spelling:
- Right-click on the fragment under which a wavy line appeared.
- To get rid of it, select "Skip".
- To make Word remember the selected word and write it into your dictionary, click Add.
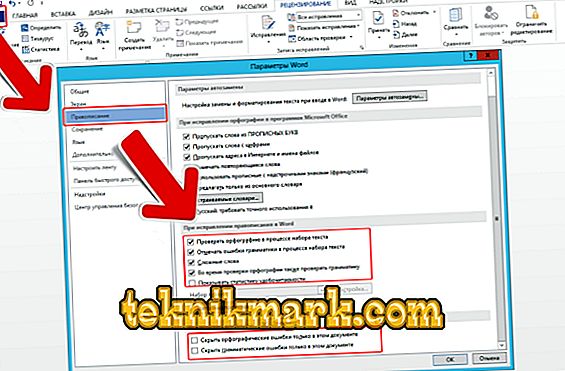
If you want to completely disable the scan, open the settings:
- Go to the Tools - Spelling menu (in Word 2007, for this you need to click on the Office logo in the upper left corner and select "Options" in the drop-down list).
- Uncheck the "Automatically check spelling" or check "Hide errors only in this document." Autocheck will stop bothering you. But looking for typos will be more difficult.
In the Word toolkit, there are various types of lines to underline text or to draw a horizontal bar. Use these functions to process documents.