Preparation for work
Dear friends, the topic of today's discussion is to install Ubuntu from a flash drive. Naturally, before the installation itself, you still need to obtain a number of necessary information that will help you do the work with high quality and without problems. So, what do we find out today:
- preparatory work;
- how to create a bootable flash drive for future use;
- actually, how to install Ubuntu from a flash drive.

Learn how to install Ubuntu from a flash drive correctly and quickly.
As is clear from the name of the block, we are now considering the preparatory stage. To begin with, we will need the flash drive itself, to which we will later write the image. It should have a volume of at least eight gigabytes, as well as the NFTS format. If you don’t say the last words about anything, don’t worry: in any case, the format can be changed, so, in principle, you don’t need to dwell on this point. If the drive is not new, be sure to format it, check for viruses using antivirus programs, and only then proceed to action.
In order for Ubuntu to install from a flash drive successfully, you need to still download the OS image. Otherwise, nothing happens. If you have ever reinstalled the OS on a personal computer before, you should know that everything starts with loading the necessary image of the system. Fortunately, they are available for download on the site //ubuntu.ru/get. Only after this stage can we proceed to the next. Please note that the download may take a long time: it all depends on the speed of the Internet connection. That is, if it is high, then the download will take place quickly and vice versa.
Create a bootable Ubuntu flash drive
Before you begin, you will need to install additional software on your computer. Consequently, the device must have an active internet connection. The program is called WinSetupFromUSB, and it is available for free download at http://www.winsetupfromusb.com/downloads/. Its installation is similar to the installation process of any other application for a computer or laptop. And also it is worth paying attention that all further actions are considered on the example of the operation of the Windows operating system.
- Install the storage device in a working USB-connector. Why does it say “working”? Very often it happens that any input on the computer junk, gives failures or other problems. In no case do not install the operating system from a similar connector, otherwise you will not avoid major problems. Use only proven USB input.
- Now run the installed WinSetupFromUSB program as administrator.
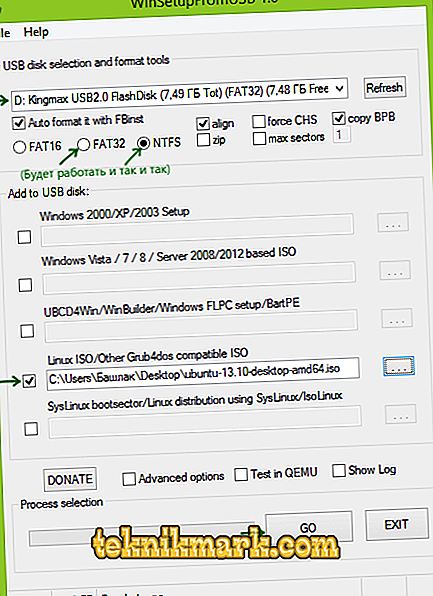
- In the window that appears, select the drive from the first item, check the box next to the NFTS item (although some users claim correct operation with the FAT32 format).
- Click on the three dots in front of the Linux ISO point and select the iso-image of the file you downloaded in the previous block.
- Now click the Go button and wait for the operation to complete. Ubuntu bootable flash drive is ready!
Make sure that all data from the USB drive will be deleted and wait for the process to complete.

Install the operating system
Training
You can proceed to the last stage, which almost all users are afraid of: how to install Ubuntu from a flash drive. In fact, the worst is over. Further it will be easier, what, in fact, you will see for yourself. To begin with, we recommend that you look in the instructions or on the website of the manufacturer of your device how the BIOS is called on the PC. Most often this is one of the F or Delete keys. But in order not to be trapped, it is better to know this information in advance.
Installation steps
Only after that proceed to the following actions.
- We connect the flash drive prepared at the last stage to the computer, turn it off.
- Press the power button to turn it back on and quickly press the key to bring up the BIOS menu.
- Here you need to rearrange the priority to boot from a flash drive. To do this, go to the Boot tab, then open the Boot Device Priority item and use the navigation keys indicated at the bottom of the page to put our drive in first place. If you do not know English, then use a translator. The BIOS menu on all computers is different, so there is no one general instruction for changing the boot priority.
- When you set the prepared drive to the first place, exit the menu with saving data. Wait for the PC to download the data.
- If you follow the previous steps correctly, you will see a welcome installation window. In the left block, you can select a language, and on the right is the type of installation: it can be a simple launch of Ubuntu for testing (the system will not be installed, you can just familiarize yourself with it, for example) and, in fact, a complete installation. Click on the second option.
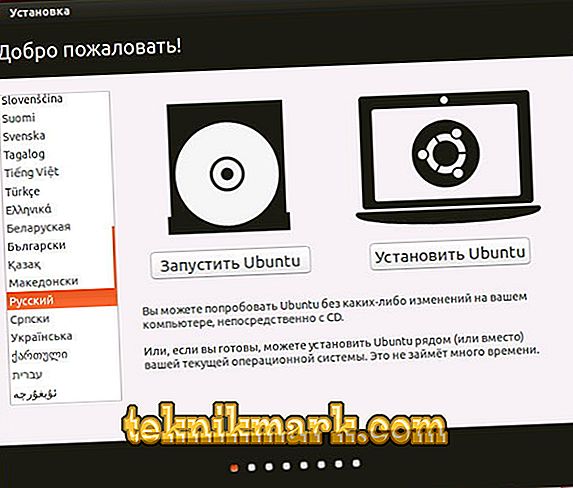
Immediately after booting from a flash drive, you will see an offer to choose a language and launch options. Choose "Install Ubuntu"
- Put the necessary parameters in the next window and click "Continue".
- Now you will need to choose the type of installation. As mentioned in the description, the system can be put both next to the existing one and instead of it. If you need Windows, you can take the first option. If you want only Ubuntu, then choose the second type. Click "Continue."
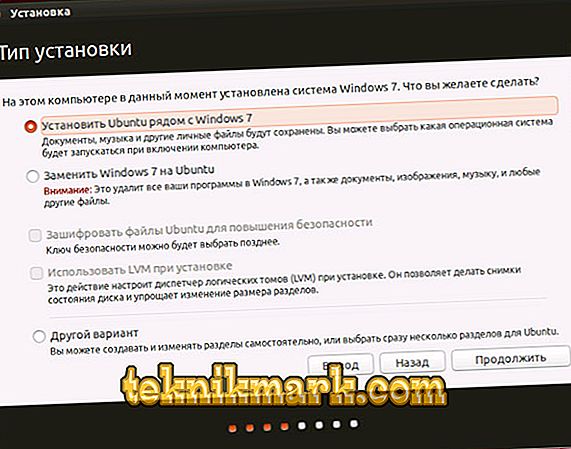
Choose the most commonly used option - install the second Ubuntu operating system, leaving Windows
- In the next window, the user is prompted to allocate disk space for the system and files. To do this, move the separator to set the necessary parameters. When you distribute everything, click Install Now, and in the dialog box that appears, click Continue, knowingly read the information presented.
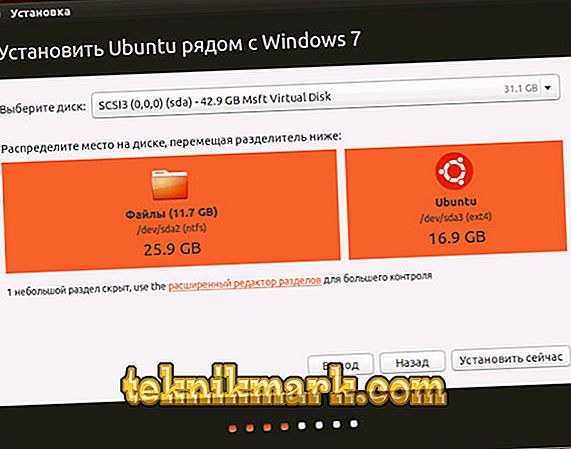
It is possible to self-partition the disk using the advanced partition editor.
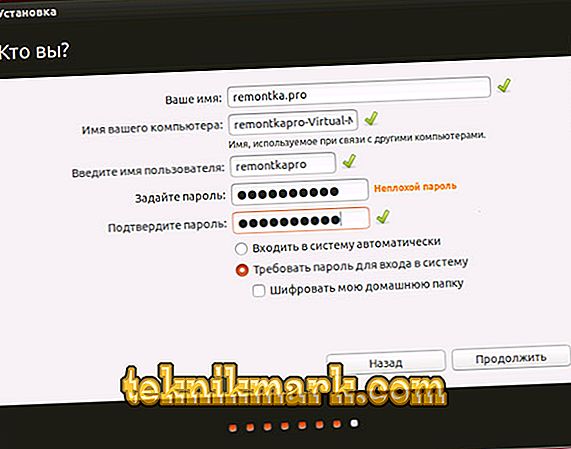
- After some time, you will see a window titled "Who are you?". Write down all the data at your discretion (name, password, and so on), then click "Continue."
Specify the time zone and keyboard layout
- Wait for the process to complete. After the computer restarts, the Ubuntu operating system interface will be presented. If at the seventh stage you left Windows, then after the reboot, you will need to select the system to start. And so will every new PC start up.


Now you can customize the OS to fit your needs: install drivers, write programs, and so on. As well as the OS can warn about the need to download some files for correct operation. These steps are required for the system to work properly.
Conclusion
Dear readers, we hope that the installation of Ubuntu from a flash drive was successful. Summarizing what was said earlier, we can identify the main stages of our joint work:
- Preparation of the flash drive to work.
- Download Ubuntu system image.
- Create bootable USB flash drive U
- Restarting the computer with setting the drive to the first place in the boot priority in the BIOS.
- System installation in ten steps.
We remind you that all actions are performed at your own risk. Carefully read all messages on the computer in order to avoid unpleasant situations. Tell us in the comments: did you manage to install Ubuntu on your PC?