Many users of modern computers, born at the turn of the XX and XXI centuries, remember the time when one of the most fascinating pastimes in computer science classes was drawing in the graphic editor built into the system.

Whoever said that, but it was extremely interesting and fascinating. Everyone could feel like an artist (and even to some degree a programmer) and turn a white background into his own individual work of art.
Time is inexorably moving forward and the computing capabilities of modern computers have already exceeded all expectations of past years.
Software is developing by leaps and bounds, and now even a person deprived of his talents, using various programs, can create amazing things that many people could not even dream of before.
Similar progress has been made to graphic editors, but this is not surprising, in the modern era of life in the framework of social networks, publicity and “beautiful” (but not always true) photographs.
Programs that allow you to breathe a second life, even in the most nondescript photo, now a great many. Everyone, based on skills and financial opportunities, can acquire for personal use the tools used by professional designers.
But there are still users who continue to use regular photo processing facilities, which are increasingly referred to as the Olda slang term.
And it is on those who continue to refer to the functionality of "Microsoft Paint", and this article is directed, which is already possible to guess from the title. Go.
How to add text
So, to begin with, it should be recalled that “Microsoft Paint” is a multi-profile raster graphics editor with a history of several decades that goes into the structure of the Windows operating system from the very first versions to the present day.
Its interface with each new version did not undergo significant changes, which lasted until the release of the Windows 10 operating system, where the Paint3D graphic editor of the same name was added, which, as it is not difficult to guess, is sharpened for more precise and volumetric image processing.
But Microsoft wisely left untouched the already beloved minimalist “Paint”, whose interface is familiar even to older people.
In this article, we will discuss two versions of the program in question, and more specifically, how to add text to the image and edit it.
"Paint"
As has already been said many times even in this article, “Paint” is the most simple image editor with the minimum functional set. Therefore, all basic tools are always at hand and available for use.
And in order to add text, it is enough to do the following:
- Open the program, click on the "File" tab and select the script you need (create a new project or open an existing one).
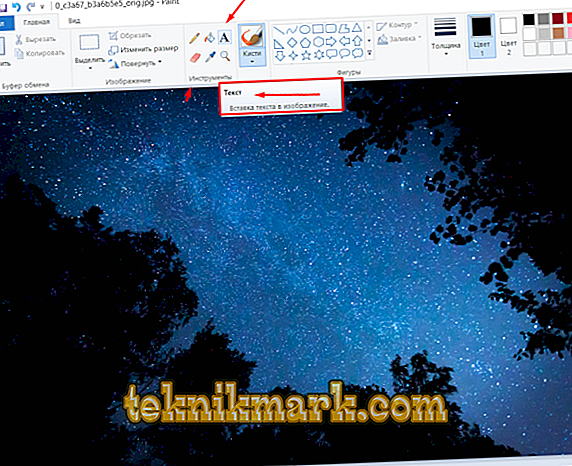
- After making this choice on the “Toolbar”, find the “Tools” block, where among the icons find “A”. When you hover over it with the mouse cursor, an explanation will appear that the tool being selected is called “Text”.
A window opens for text formatting.
- Then click on it with the mouse and, holding the cursor, mark a rectangular area on the image where the text block will be placed.
- Then a tab will appear, where an additional set of tools for formatting and editing text content will be presented, for example:
- "Font".
- "Font size".
- "Bold, bold, italic, crossed out."
- "Background Transparency".
- "Colour".


A tab opens for text formatting.
It remains only to choose the formatting you need from the options presented. In the choice of the font, no one limits you, because you can find and download a huge number of options, and if you want and have certain skills, you can create your own version.
In order to rotate the text, simply click on the "Select" button, respectively, select the desired area and, using the "Rotate" functionality, select the option you need.
Paint3D
As mentioned above, this editor has been developed taking into account current trends, as it is most up-to-date and aimed at more experienced users.
But even these circumstances have slightly complicated the process in question:
- Open the program and, by analogy with the above, determine the further course of action.

A window opens with the definition of the order of actions
- The toolbar is at the top, and the desired option is called "Text".
- Click on it, and in the right side of the editor window a formatting panel will appear with a similar set of features.
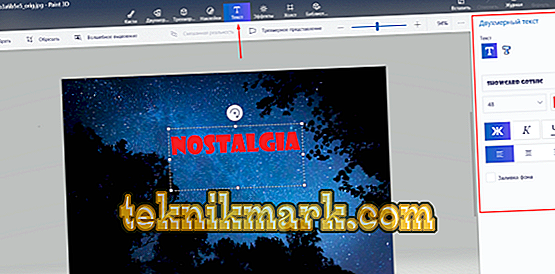
The text formatting panel has opened in the editor.


Unlike your “relative”, using “Paint3D” you can create volumetric text by clicking on the corresponding button on the formatting panel:
- After activating this mode, click on the "3D view" button.
- Enter the text you want in the marked rectangular area and place and rotate the text in the desired way.
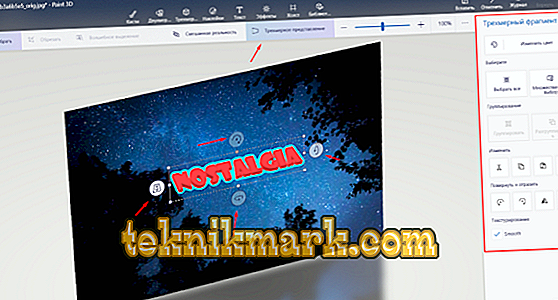
Enter the desired text and rotate the picture

The formatting panel of the created three-dimensional fragment is also available for use.
It is worth recalling that all files created by default are to be saved in the folder “Volumetric Objects”, which has recently been added to “Explorer”.
Conclusion
That's all. Working with the built-in graphic editor, even the updated version, continues to be just as simple, but at the same time it retains its usual surroundings and evokes certain feelings of nostalgia.