If you use a wireless network outside the home, the signal strength is constantly low. In a cafe or business center, routers are not installed in every room. And the power of receivers on modern laptops and smartphones is rather small.

Antenna for receiving Wi-Fi signal can be made independently
You can pay attention to popular solutions - expensive external antennas. Someone uses a 3G modem with the function of the router, but the Internet speed is thus reduced, and the cost increases significantly. We will tell how to make an antenna for Wi-Fi from the available tools.
What is needed?
The financial cost of the antenna for Wi-Fi should not be more than $ 35. You will need:
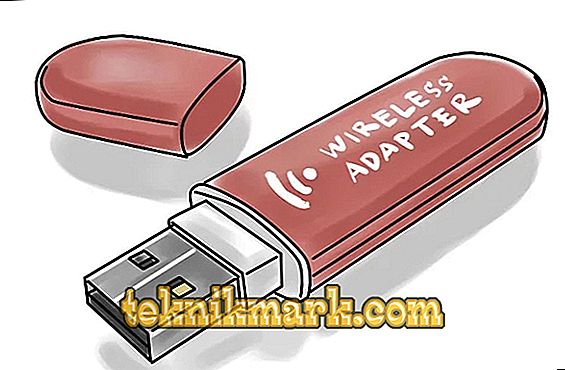
- USB receiver for Wi-Fi networks of the "dongle" form factor. You can find this in major electronics stores or on the radio market.
- Any hemispherical kitchenware (metal). A colander or sieve will do.
- Passive USB extension cable type A. If finances permit, it is still better than active - it will allow you to place the antenna higher. We will be able to connect 2-3 cables when there is no extension cord of the desired size.
- Consumables: hot melt glue, adhesive tape, a piece of garden hose (required). Foil, rope (optional).
How to choose the right parts?
USB receiver
Receiver WI-Fi for our purposes must meet several parameters:
- It is advisable to purchase a "dongle", in size it looks like a small flash drive or thumb. A larger adapter would be better to “catch” the signal, but with a homemade antenna it is more difficult to use.
- Pay attention to the work of the receiver with the standards 802.11 and 802.11g. This will give the Wi-Fi antenna good compatibility.
- Buy an external receiver, even if you have a built-in.

USB extension cable
We will need to make the antenna directional. This means that the USB cable must be long enough. Calculate it in advance. The cable must not be longer than 5 meters, otherwise signal distortions are possible.

Cookware
The best crockery for this purpose is a pot with a mesh bottom of a semicircular shape. Suitable Asian dishes, steamer, sieve or lid from the lamp. The shape of the hemisphere and the metal body - the basic requirements. If you plan to make a big antenna, the old television is fine. Consider possible installation problems.

Assembly and connection of the receiver
Connect the Wi-Fi adapter and part of the extension cable to the antenna. It is better to use hot melt glue or double-sided tape. The adapter should be installed in the center of the antenna, a few centimeters above its surface (in the ideal case). It is important to direct the receiving center of the antenna exactly at the signal transmission point, since it is highly directional.

Connect the desired end of the USB extension cable to the computer. Install the receiver in the same way as a standard Wi-Fi adapter.
IMPORTANT. It is better to immediately adjust the signal level.This can be done using programs, for example:
- NetStumbler, Free Wi-Fi Scanner, NetSpot (for Windows);
- NetSpot (for OS X);
- LinSSID, iwScanner (Linux).
We considered the manufacture of the most primitive antenna for receiving a Wi-Fi signal. Further more!
Antenna "Biquadrat"
Another name for Wi-Fi signal receivers of this type is “Kharchenko zigzag”. A biquadrat antenna is relatively easy to manufacture. It refers to the best options for the ratio of complexity, production time and the result obtained.
Components
For a biquadratic antenna, we will need:
- copper tube or N-connector;
- unilateral textolite;
- copper wiring (diameter 1.5–3 mm);
- cable RG-6U (coaxial).
These components can be found on the local radio market or in a radio store.
Procedure
- To make a reflector, it is necessary to cut a square with a side of 1.1 cm from PCB.
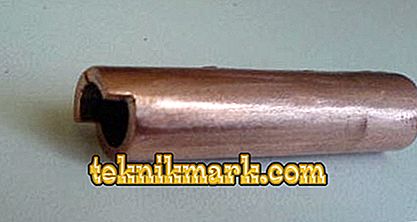
- Drill a hole in the center of the reflector that matches the outer diameter of the copper tube. The tube should hold the coaxial cable tightly inside. The outer braid of the cable should be bent “back” along the tube by about 50 mm.

- Zero hole drilled in the antenna reflector Wi-Fi.
- Cut at one end of the copper tube half the radius of the metal top. The cut must be done to a depth of 0.5 mm + wire diameter.
- Insert the copper tube into the textolite shape so that its part protrudes approximately 1.6 cm.
- Prepare the copper wire for work by making notches on it every 30.5 mm. The total length of the desired wire - 25 cm.
- Bend the wire in the form of zigzag over the notches. As a result, you should have 2 squares touching in the center.

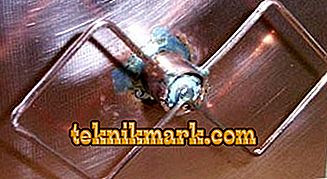
- Connect the copper mold to the tube prepared previously. This will be the Wi-Fi antenna. Solder the free ends of the wire to the upper (uncut) part of the tube. The whole part of the copper construction must be soldered to the central core of the coaxial cable.
- The resulting bi-quad antenna can “output” a signal gain of up to 19 dB. Use on health!


Spiral antenna
As a signal receiver for a router, you can use another interesting type of antenna. This is a spiral structure that was invented back in 1947. According to some reports, it is able to receive a signal from a distance of about 650 meters.
Components
- Copper or aluminum plate - for reflector. It should not be too thin.
- Copper wiring length of about 150 cm and a diameter of at least 1 mm.
- Mounts.
- Viniplast core round shape.
- Copper foil, which will need to be rounded around the core.
- Wi-Fi network card connector.
Manufacturing process
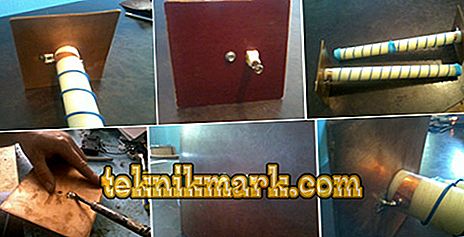
- Put the markings on the core - a little less than every 3 cm. These will be marks under the coils.
- Coil the copper wiring onto the core. It is better to pre-align it.
- Fix the coils on the tags with glue. This should be done as smoothly as possible. The result should be 12 turns.

- Attach the core to the reflector of the future Wi-Fi receiver. For these purposes, you can use a self-tapping screw with a length of about 5 cm.
- Create a markup for the hole in the center of the plate. Its diameter should depend on the screw used for fastening. Drill a hole for the connector.
- Solder the shield contact to the surface of the reflector. The central core should be soldered to a triangular plate made of copper foil.
- Solder the tip of a copper wire helix to a thin corner of a triangular plate. His hypotenuse should be a "continuation" of the spiral.
- Places where the solder was applied, it is better to close the environment with silicone.


Good. What's next?
We hope you understand that you need to make two antennas? One - in a place with an active signal and a router, the other - in the place of reception of a signal. Point to Point software will help secure the connection from lovers of “free neighbor Wi-Fi”.
- To reduce signal attenuation, use a minimum cable length.
- It is better to place the Wi-Fi modem as close as possible to the antenna.
findings
You can use a Wi-Fi antenna of any of the types listed here: simple, biquadratic, or helical, depending on specific needs and goals. We recommend practicing on the first option - so you will work out the skills. However, for a person with technical experience, the manufacture of more complex products is not a problem.
Did you like the material? Share it with friends and friends on social networks! We will be happy if you helped solve the problem with communication.