Server technologies allow transmitting computing power to the client. The so-called Terminal Server can "rent" performance resources. This is extremely useful if you have a well-equipped "machine" on Windows Server 2008 R2 and several weak, outdated terminals.

How to install and configure a terminal server in Windows Server 2008 R2.
A typical use case is working with 1C from another continent using an RDP client. The computational capabilities of the computer on which the programs are running are absolutely not important, since the entire burden falls on the server.
What you need to start
- Powerful PC with Windows Server 2008 R2 installed on it. Setting up such a Windows to work harder than others. We will not consider its configuration within this material. TIP. For good operation of the Terminal Server, it is desirable to have from 32 GB of RAM. Not bad, if your configuration also has 2 processors with four cores each.
- Client license of the terminal server, which is valid at the moment. Mostly now use the Enterprise Agreement licenses.
- This is a quick guide.
Vehicle installation
All instructions are relevant for a ready-to-use and fully configured Windows Server 2008 R2. To continue, make sure that:
- Configured network adapters.
- The system is correctly timed.
- Automatic update is inactive.
- The host name is set.
- RDP configured.
- The TEMP folder is specified as the temporary file storage.
- The account name is not a default (it is undesirable to use the names Admin, User, Root, or other similar ones).
Remote PC service and its configuration
- In the Start menu, find Administrative Tools - Server Manager and navigate to it.
- In the left navigation pane, select Roles, then in the central Add roles window.

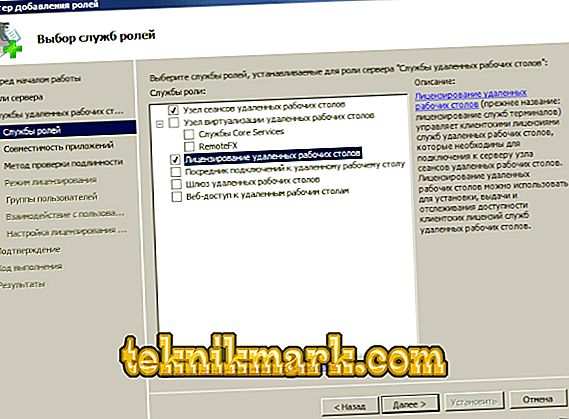
- Choose a single role - Remote Desktop Services and click Next. In the next window - define the flags of the role service RD Session Host and RD Licensing ("Session Host ..." and "Licensing ...").
- Select the authentication method "Do not require ...". This will allow clients with older versions of RDP to work with a terminal server.

- In the Specify Licensing Mode, select one of three options:


- Per device (per device). Preferred method. Licensing of the Terminal Server for each individual device.
- Per user (per user). The terminal server on Windows Server 2008 R2 is licensed for individual users.
- Configure later. Delays the choice of licensing method.


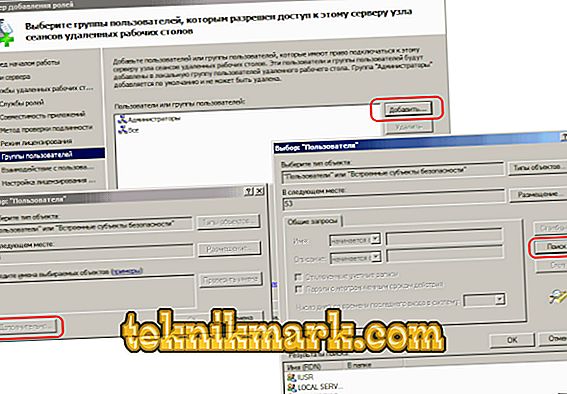
- In the next window, select the user group that will have access to the Terminal Server. Everyone - for everyone who has a license. Click Add - Advanced and add Everyone below. Confirm selection.
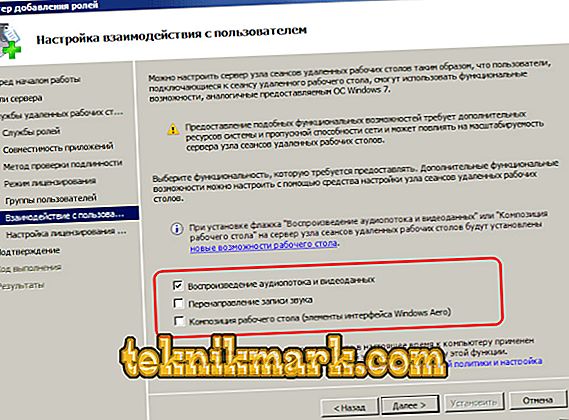
- In the Add Roles Wizard, you can enable advanced server settings when necessary. Carefully study the wizard if remote server users need to provide video or music content.
- In Configure Discovery Scope, set the detection area settings (to set permissions). Install "Configure a discovery scope ..." and ...:


- If the PC with Windows Server 2008 R2 is in the domain - This domain or The forest.
- If not - This workgroup.


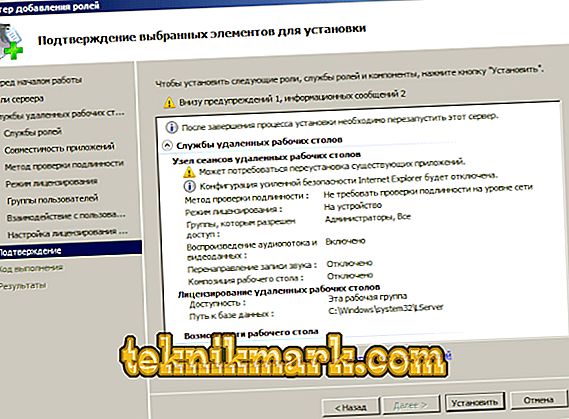
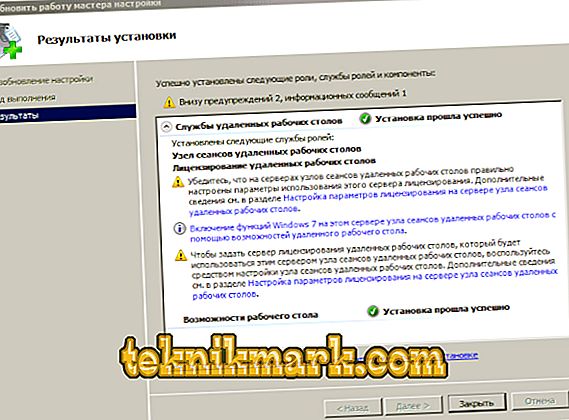
- Confirm the items selected for installation. Carefully check the selection, make sure to save the settings and restart the computer.

Licensing (activation)
After restarting Windows Server 2008 R2, you will see a message - “The licensing server is not configured ...”.
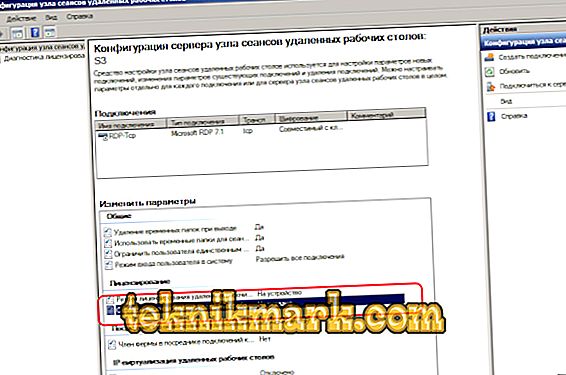
- Go to Start - Administrative Tools - Remote Desktop Services - RDS Host Configuration.
- In the main window, you should see Not Specified opposite RD license servers. Double-click on the label.
- Select Per device - Add. In the new window, enter the name of your server, then Add and click OK. Now in Windows Server 2008 R2 the source of licensing is indicated, but the activation is not finished yet.
- Start - “Administrative ...” - RD Services (“Remote Desktop Services”) - Remote Desktop LM.
- In the context menu of the properties of your terminal server, select Activate Server.
- The “Activation Wizard ...” (AS Wizard) starts. In the first window, leave the Automatic connection.
- In the following forms, enter your data in all free fields. In the Activate Server Wizard, the fields can be left blank.
- You will see a completion window. Opposite to Start Install LW now there should be a flag.
- Select License Program - Enterprise Agreement. If you have a different type of license, find it in the list.
- In the next step of the "Wizard" enter one of the numbers to the right in the free field.
- In the Product version and license type, select the OS version (in our case, Windows Server 2008 R2) and the type of activation (license) - Per device CAL or other. Quantity (“Quantity”) - preferably “9999”.


To check whether the activation works correctly, go to the RD Session Host (in the Start menu folder, which we worked with earlier) and examine all the settings you made.
Additions
Terminal Server running Windows Server 2008 R2 allows you to make additional settings on client computers. To connect a printer from a local network to a session, you need to install its drivers on the server and user terminal. After that, set the "Printers" flag in the "Local devices and resources" window.
TIP. If the target computers are running Windows XP SP3 (at a minimum), then in the Add roles wizard “Authentication Wizard” it is better to specify “Require authentication ...” (Require authentication). If not - the opposite point.If possible, use Windows Server 2012 R2 or a newer Windows Server. This solution is easier to set up and better scaling.
findings
We familiarized with the features of setting up Windows Server 2008 R2 and discussed the step-by-step installation of the most important parameters. We are sure that now it will be easier for you to create and configure your own terminal server.
Did you use version 2012 R2? We have a detailed guide for this version of Windows. Look for it, as well as many other interesting information among our materials!